|
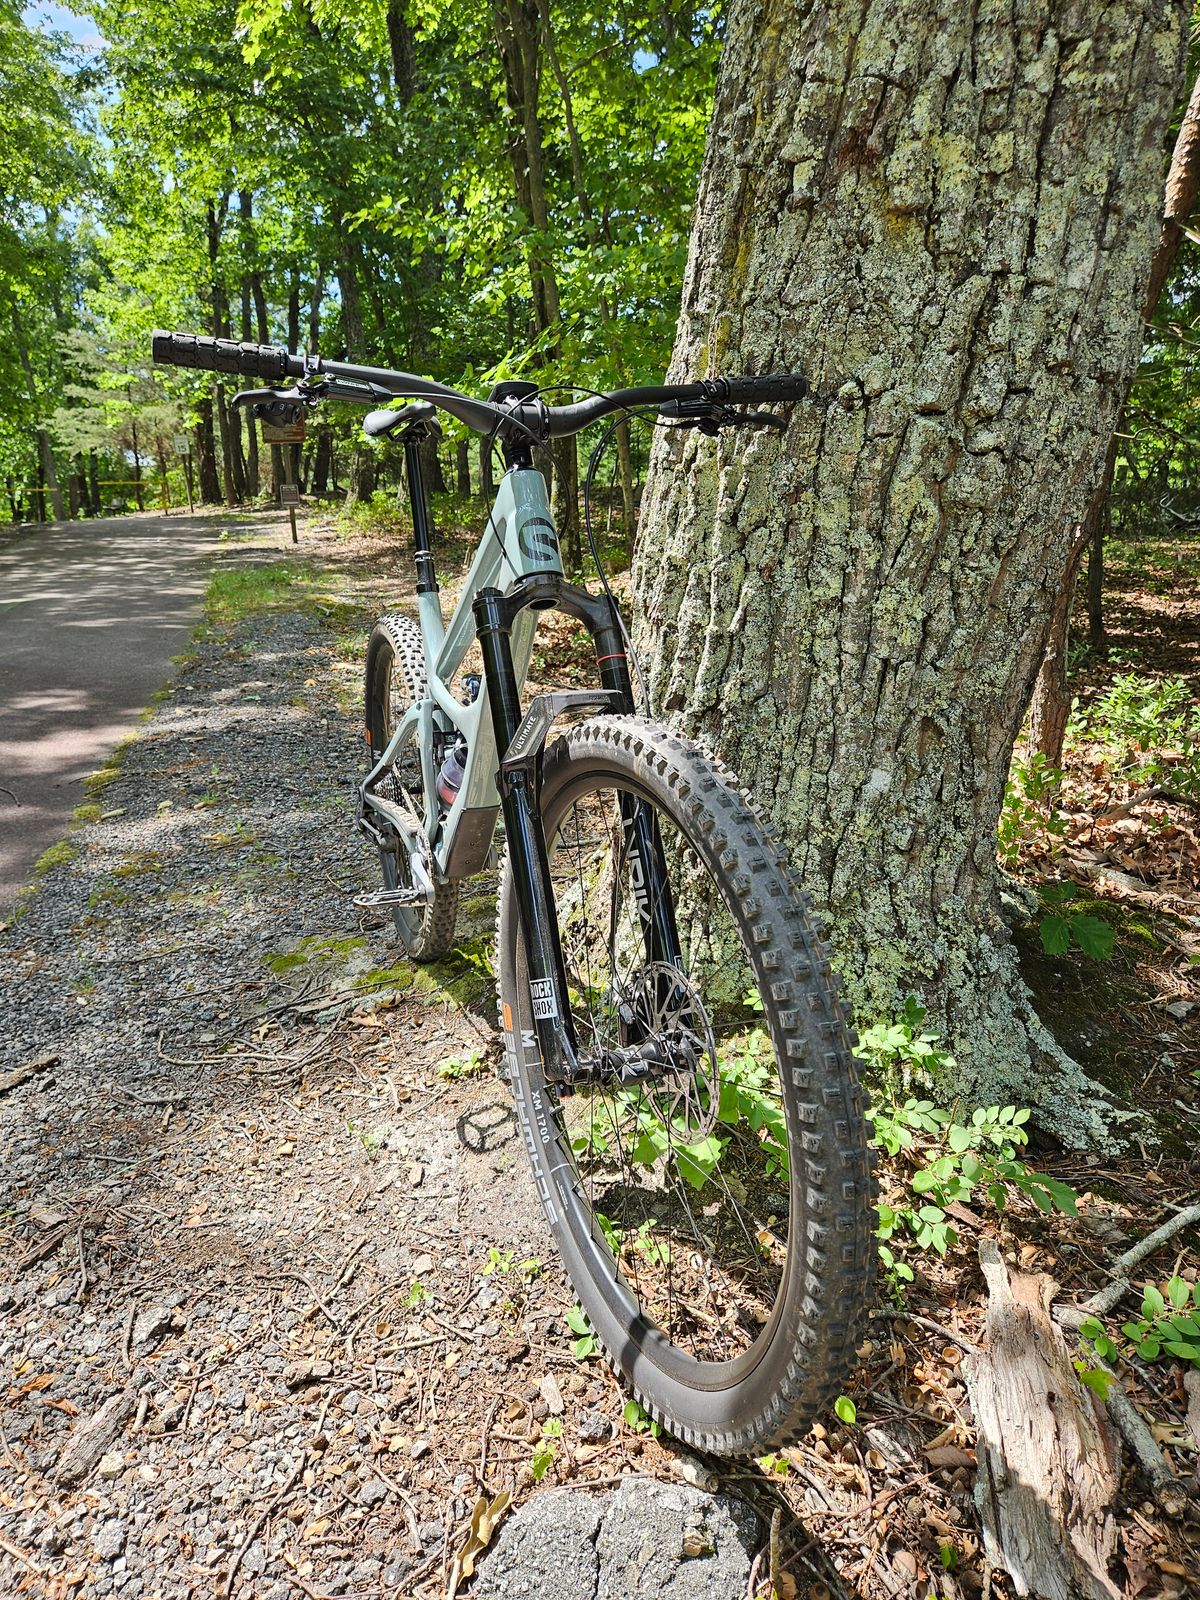
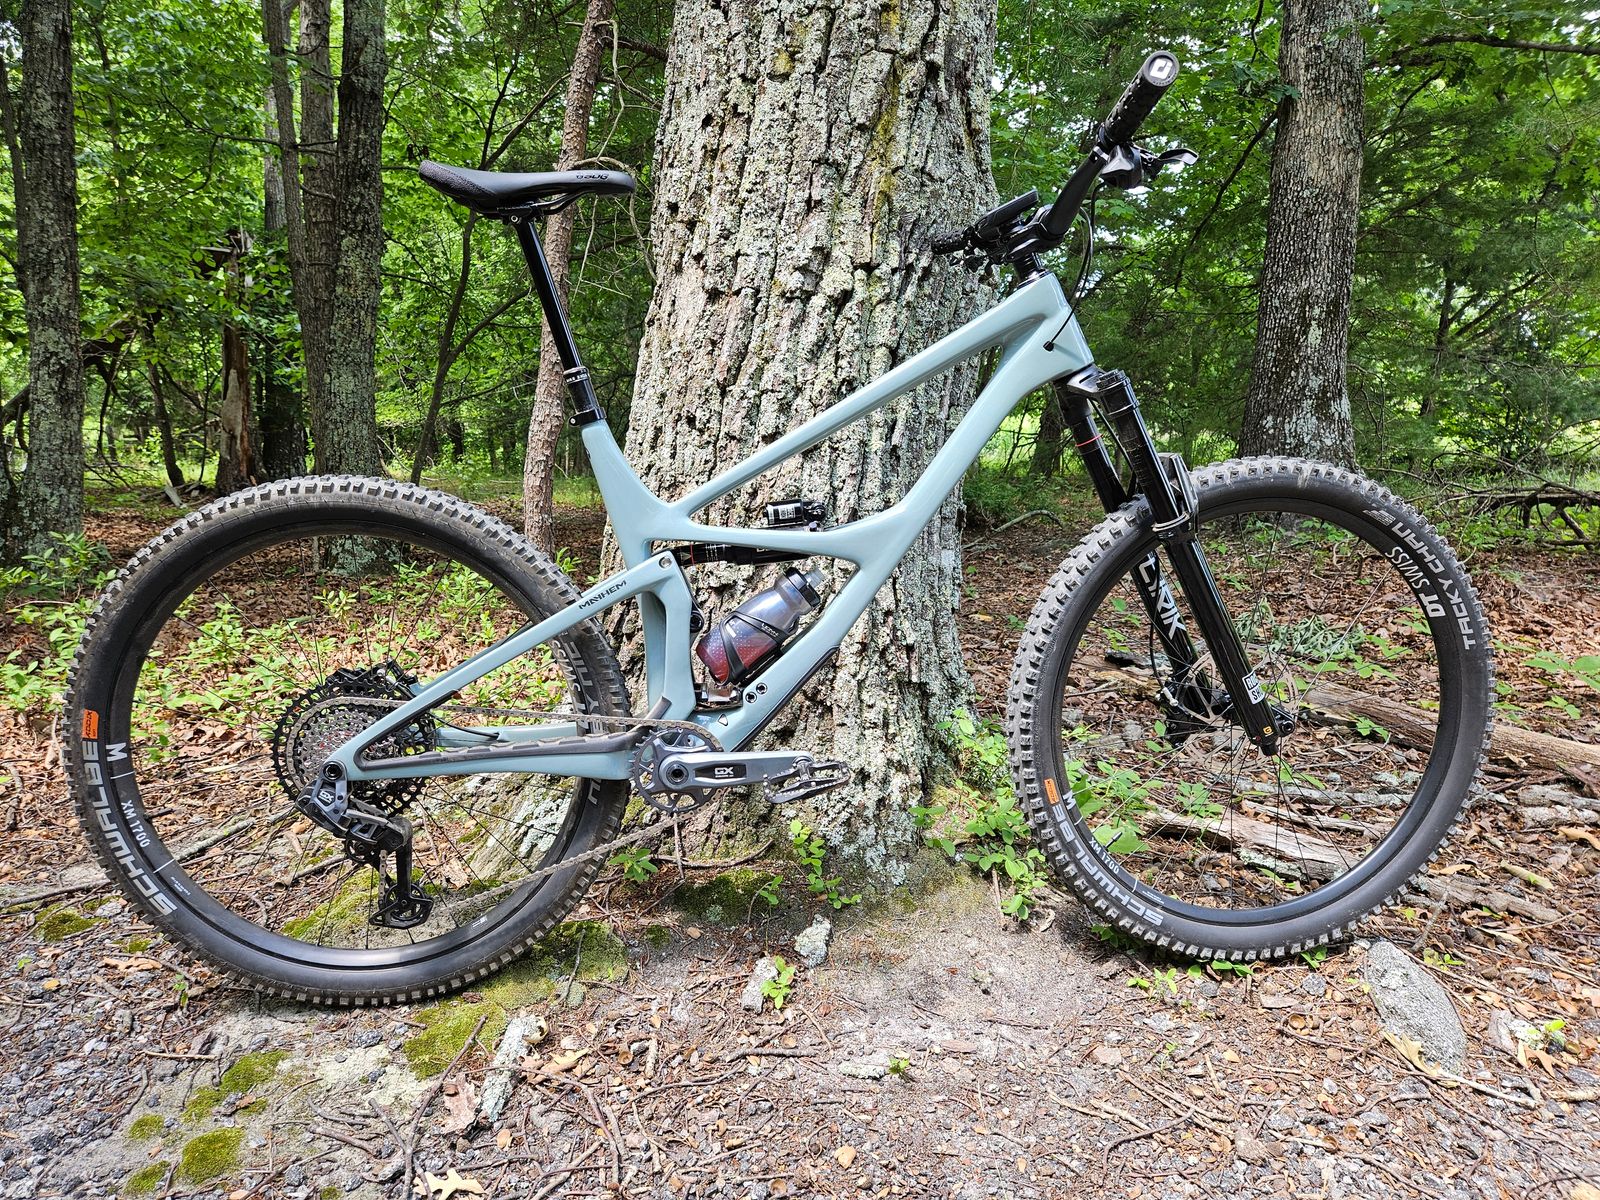
Frame |
4-Star Build Level |
5-Star Build Level |
6-Star Build Level |
| Weight (lbs.) |
S: 7.2 | M: 7.3 | L: 7.4 | XL: 7.5 |
S: 31.7 | M: 31.8 | L: 31.9 | XL: 32 |
S: 30.9 | M: 31 | L: 31.1 | XL: 31.2 |
S: 29.8 | M: 29.9 | L: 30 | XL: 30.1 |
| Shock |
2027 Rockshox Super Deluxe Ultimate with Hydraulic Bottom-Out | 230 X 60 |
2027 Rockshox Super Deluxe Ultimate with Hydraulic Bottom-Out | 230 X 60 |
2027 Rockshox Super Deluxe Ultimate with Hydraulic Bottom-Out | 230 X 60 |
2027 Rockshox Super Deluxe Ultimate with Hydraulic Bottom-Out | 230 X 60 |
| Fork |
NA |
2027 Rockshox Lyrik Select | 160mm | 44OS | Maxle Stealth |
2027 Rockshox Lyrik Select | 160mm | 44OS | Maxle Stealth |
2027 Rockshox Lyrik Ultimate | 160mm | 44OS | Maxle Stealth |
| Headset |
NA |
Cane Creek 50 | ZS44/ZS56 ZS44 upper | ZS56 lower |
Cane Creek 50 | ZS44/ZS56 ZS44 upper | ZS56 lower |
Cane Creek 50 | ZS44/ZS56 ZS44 upper | ZS56 lower |
| Crankset |
NA |
SRAM S1000 Eagle | 170mm | 32t |
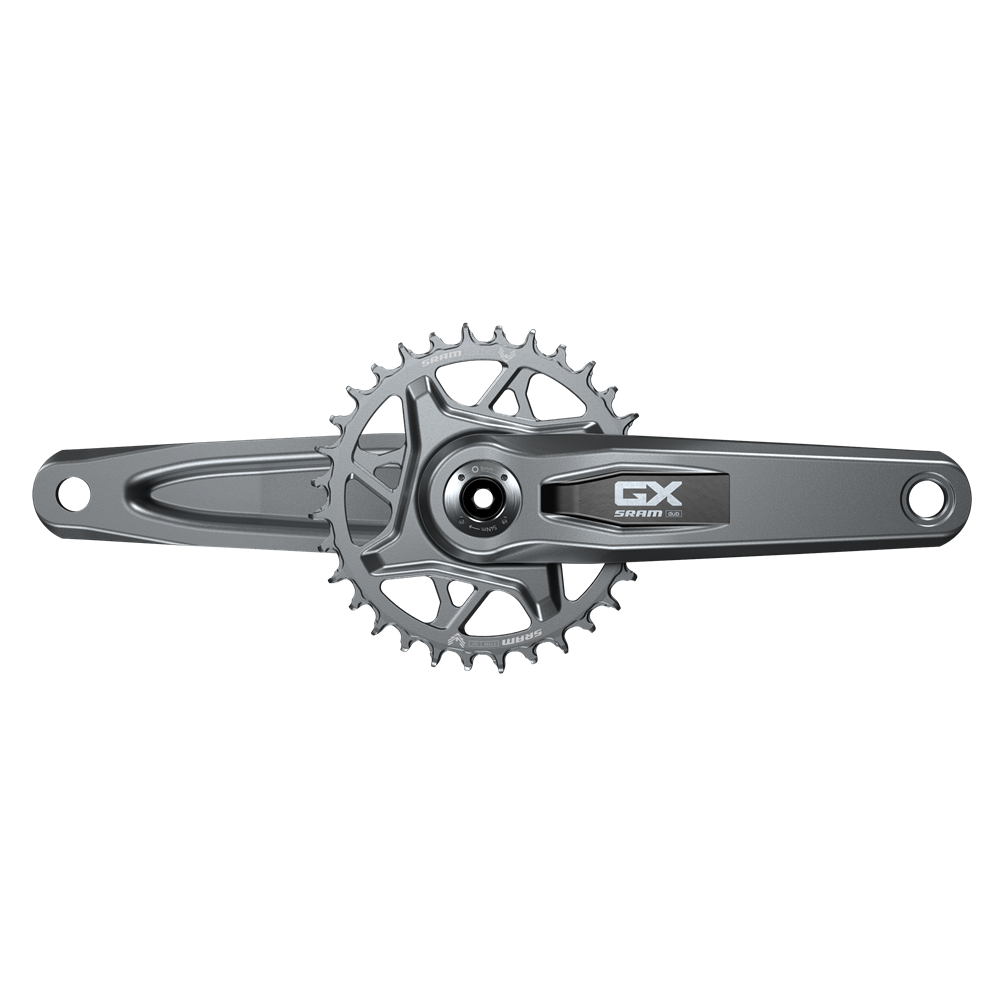
SRAM GX Eagle Transmission | 170mm | 32t |
SRAM XX Transmission | 170mm | 32t | 174mm Q-Factor |
| Cassette |
NA |
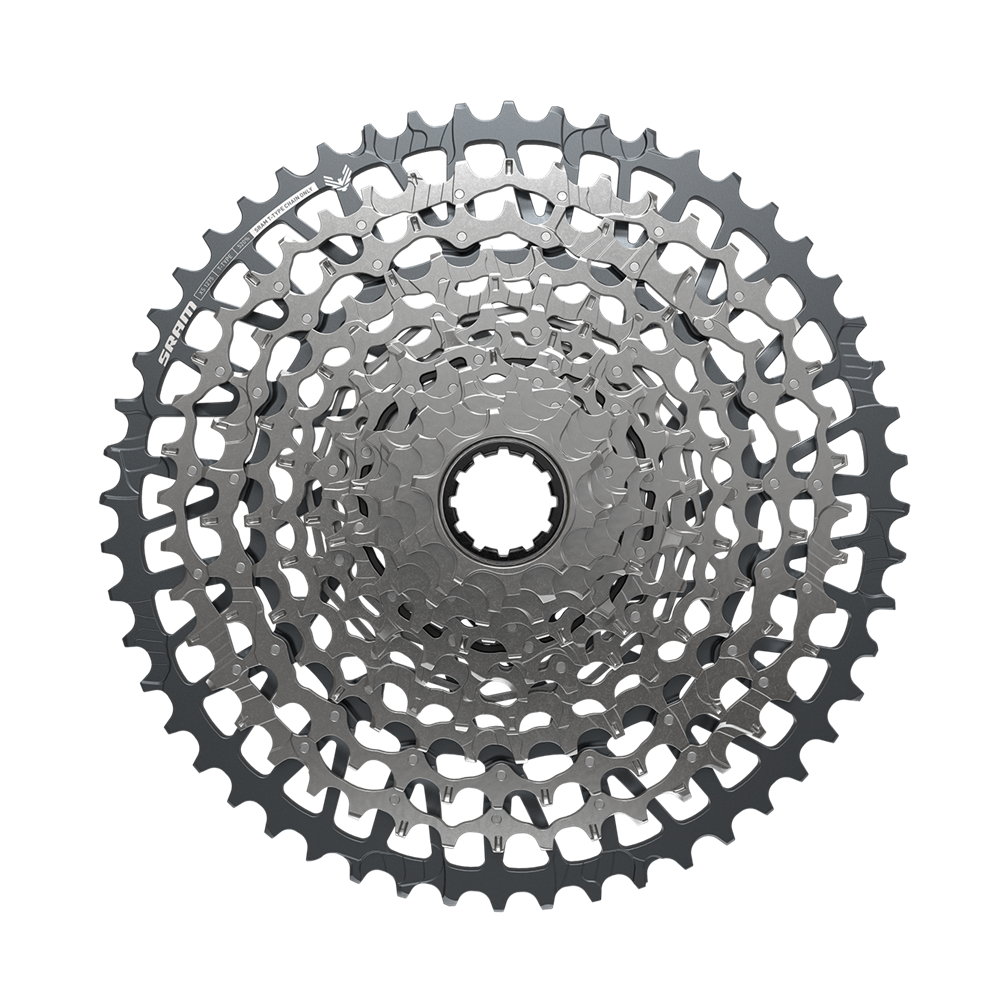
SRAM | GX Eagle | XS-1275 | T-Type | 10-52 | 12-Speed |
SRAM GX | Eagle | XS-1275 | T-Type | 10-52 |
SRAM CS1297 | XX Transmission | 10-52 |
| Derailleur |
NA |
SRAM Eagle 90 Transmission |
SRAM GX AXS Transmission |
SRAM XX AXS Transmission |
| Shift Lever |
NA |
SRAM Eagle 90 Transmission |
SRAM AXS Pod Right MMX |
SRAM AXS Pod Right MMX |
| Bottom Bracket |
NA |
SRAM DUB BSA 73mm Threaded |
SRAM DUB BSA 73mm Threaded |
SRAM DUB BSA 73mm Threaded |
| Front Brake |
NA |
SRAM Maven Base | 200mm Centerline Rotor |
SRAM Maven Base | 200mm Centerline Rotor |
SRAM Maven Silver | 200mm HS2 Rotor |
| Rear Brake |
NA |
SRAM Maven Base | 180mm HS2 Rotor |
SRAM Maven Base | 180mm HS2 Rotor |
SRAM Maven Silver | 180mm HS2 Rotor |
| Chain |
NA |
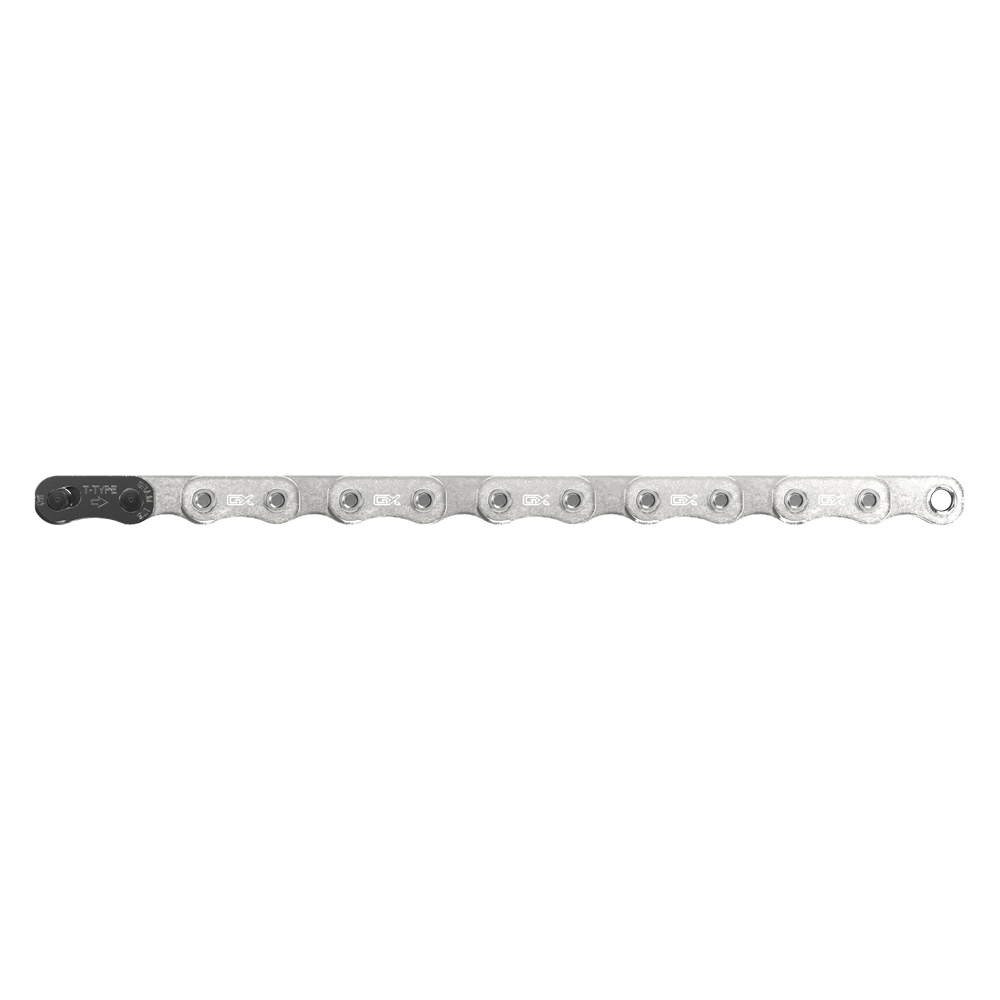
SRAM GX Transmission Flattop | Silver |
SRAM GX Transmission Flattop | Silver |
SRAM XX Eagle | Silver |
| Front Wheel |
NA |
DT Swiss | M 1900 SPLINE | 15x110 | 29” | 6-Bolt |
DT Swiss | M 1900 SPLINE | 15x110 | 29” | 6-Bolt |
Industry Nine Hydra 2 Sector Carbon | 32H | 15 X 110 |
| Rear Wheel |
NA |
DT Swiss | M 1900 SPLINE | 12x148 | 29” | XD | 6-Bolt |
DT Swiss | M 1900 SPLINE | 12x148 | 29” | XD | 6-Bolt |
Industry Nine Hydra 2 Sector Carbon | 32H | 12x148 |
| Front Tire |
NA |
Schwalbe Tacky Chan | 29x2.4 | Super Ground Casing | Ultra Soft Compound |
Schwalbe Tacky Chan | 29x2.4 | Super Ground Casing | Ultra Soft Compound |
Schwalbe Tacky Chan | 29x2.4 | Super Ground Casing | Ultra Soft Compound |
| Rear Tire |
NA |
Schwalbe Tacky Chan | 29x2.4 | Super Ground Casing | Soft Compound |
Schwalbe Tacky Chan | 29x2.4 | Super Ground Casing | Soft Compound |
Schwalbe Tacky Chan | 29x2.4 | Super Ground Casing | Soft Compound |
| Stem |
NA |
Race Face Aeffect | 40mm | 35mm Clamp |
Race Face Aeffect | 40mm | 35mm Clamp |
Race Face Aeffect | 40mm | 35mm Clamp |
| Handlebar |
NA |
Race Face Aeffect R | 35mm Clamp | 20mm Rise | Sweep: 8 ° Back | 5° Up | XL: 780mm | LG: 780mm | MD: 780mm | SM: 760mm |
OneUp Aluminum | 35mm Clamp | 20mm Rise | Sweep: 8 ° Back | 5° Up | Widths: XL: 800mm | LG: 800mm | MD: 780mm | SM: 760mm |
OneUp Carbon | 35mm Clamp | 20mm Rise | Sweep: 8 ° Back | 5° Up | Widths: XL: 800mm | LG: 800mm | MD: 780mm | SM: 760mm |
| Grips |
NA |
ODI Elite Pro Lock-On |
ODI Elite Pro Lock-On |
ODI Elite Pro Lock-On |
| Seat Post |
NA |
BikeYoke Revive 185 mm for XL and Large | 160 mm for Medium | 125 mm for Small | Internal | 31.6 |
BikeYoke Revive 185 mm for XL and Large | 160 mm for Medium | 125 mm for Small | Internal | 31.6 |
Rockshox Reverb AXS B1 | AXS Pod Left MMX | 175 mm for XL and Large | 150 mm for Medium | 125 mm for Small | 31.6 |
| Saddle |
NA |
SDG Bel-Air V3 |
SDG Bel-Air V3 |
SDG Bel-Air V3 |